![]()
SunChaser The Eagle Project Summary |
![]()
SunChaser The Eagle Project Summary |
Sept 2004 through Nov 2005:Here is a quick summary of what we have done. I broke it down into 5 parts. 1) Take out insides. 2) Take off outsides. 3) Cut and weld. 4) Reskin outsides. 5) Replace insides.
Not everything necessarily happened in that order. For instance, we did some cutting and welding during the "take out insides" when we found rusted frame pieces in the front corner, just behind the door.
Once we finish the 5 parts, then we'll have a good shell in which to build our motorhome (coach), and phase one will be complete. Right now (end of Nov 2005), 15 months later (mostly working as weekend warriors) we are nearing the end of phase one.
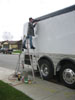
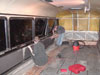
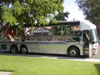
Here are some before pictures, so you know what we started with. I look at these now, and think this couldn't be the same bus!
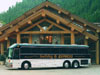
47 Passenger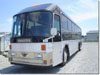
Outside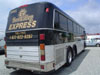
Outside 2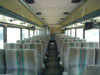
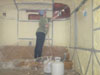
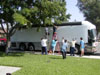
InsideTake out insides:
Everybody pitched in and helped.
Demolition 2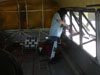
Unscrew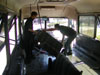
Remove seats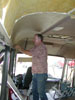
Bob wall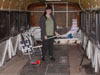
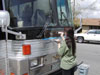
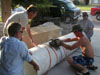
Masking tape wallsTake off outsides; Cut and weld:
Here are some cut and weld pictures. The rust in the front wheel wells needed to be dealt with.
Before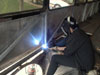
Welding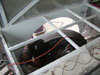
AfterWe also took the double doors, and welded into a single door.
Taylor welding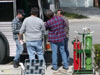
Torch handle hole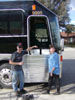
Aluminum doneA little fiberglass patch took care of the hole where the Destination sign used to be.
Me smear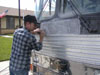
Sanding smooth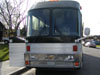
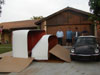
AfterThe roof raise was quite exciting, knowing it was going to be one of the biggest tasks of this project. Everybody was here to help! We removed the windows, the front cap, and the rear cap. With the inside braced, we cut the frame all the way around, then jacked to roof up. The spacers were welded into place.
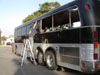
Removing windows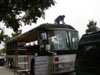
Rem front cap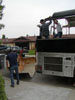
Rem back cap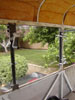
Braced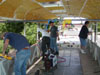
THE RAISEHere is the bus with no front cap, no rear cap, no windows, and the roof is higher than the day it was born.
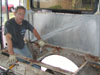
Reskin outsides: 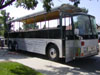
Wa-la Oo-la-la
Replacing the caps were first on the agenda immediately after the roof-raise.
Both Caps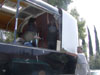
Rear cap installation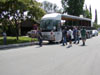
Front cap - 7 HeadsWe uncovered a bit a history, when we found the remains of the Greyhound side under a patch of skin.
We reskinned the bus, using Kemlite "Reflections", which is similar to fiberglass. The finished skin is one piece (per side) that measures about 6' tall by 35' long (behind the entry door to the rear of the bus). Preparing for the skin included framing for a lower window, and a refrigerator vent. We also welded cross bars where windows were removed, and won't be replaced by new windows. 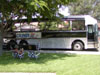
Greyhound
Cutting skin
Open Bus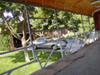
Open View
Riveting new side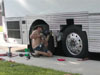
Cut new
wheel well
aluminum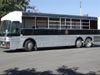
Other side is nextPreparing the other side took a lot of grinding and applying primer, as always (every tasks includes grinding & applying primer!). We also welded a frame for the hot water heater door. We have great friends! We can count on them for help on the big jobs! Then, it's time to relax, and party!

Pound bent frame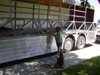
Weld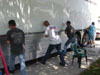
Last rivet row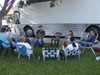
Ahhh.. done
time to
celebrateReplace insides:
So far, we just finished laying the new plywood. We heavily insulated the area between the engine and the plywood. Most of the plywood seams and imperfections are filled with wood putty and sanded. We plan to apply a coat of water seal also.
Beautiful!
Next section
More sandingWe are also preparing the walls for spray insulation. We've caulked around every frame piece, so the insulation will not get between the frame and the skin, and push the skin out. After we make sure we don't need to run any electrical wires in the wall, we'll plan to do the wall insulation next.
We now have a name for our bus
** SunChaser **
This is what she looked like November 2005.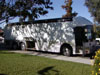
Outside view
2006:
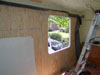
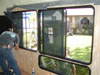
So far this year, Art has been diligently trying to leakproof the old girl. Seems SunChaser is going to be a good name, because if we don't stop these leaks, we'll be running from the rain! We also have insulated the inside, ready for walls. We're in the middle of installing the inner side wall and windows now! Wooo-hoo, looks more like a coach every weekend now!
Leak detail
Insulation
Walls
and Windows2006 Continued:
We are well into 2006 now, and have started the 3rd year into this project! Can you believe it? I can't!
Now everything we do seems to make a big difference. We've added just about everything to the roof that we'll need: air conditioners, vents, skylights, and satelite. We also have most of the sub-interior done. A little more ceiling to cover, and the front cap, then all the insulation will be concealed! After that, will start on creating rooms!! The good news is, there has been no more leaking! Here is a peek at how she looks today.
Driver side
Roof ornaments
Ceiling
The remainder of 2006 and the start of 2007:
It is so much fun watching the pieces all come together. We have a good portion of the interior selected and in most cases purchased. That includes wallpaper, vinyl headliner, valance and bedspread material, bed, livingroom furniture, toilet, etc.
We have most of the electrical wiring done in the ceiling area, and completed a couple ceiling panels with lights.
The front cap has come a long way since we've added wood and aluminum to the cabinets, installed the eagle window, and started on the front dash that included the removable floor for the co-pilot.
We've also started on the wallpapering project, and are preparing to make the bedroom cabinets and bedframe.
Lights
Front cap
Front dash
Wall-liner
2007:
The inside is progressing. The bedroom is now mostly done.

The bays are also coming along. They are now lined with indoor/outdoor carpet. The generator, inverter, and tanks have been installed... they're not connected to anything, but are secured.
Generator
Tanks & Inverter
Tanks, frontsideThe outside is now painted. We had it painted at a local collision center. These two pictures show how different the paint looks in the sun and the shade. Doesn't even look like the same bus!


On the inside we have made significant headway on the vinyl. The livingroom is completed, and some of the front cap. I am soooo happy with everything!

End of 2007, start of 2008:
OH MY! You would not believe the diffence in the last 6 months!
The ceiling is completely covered, and so are the side walls, all the way back. We have built interior walls to define the rooms. We now have a bedroom /bathroom, and a kitchen / livingroom. We also have the floor completely covered in carpet or linoleum.


In the bedroom the bedspread and blinds are on/installed.


In the bathroom, the shower and toilet are attached. The plumbing is nearly ready for use. The closet, dressers and bathroom cabinet are built.


I we haven't done much to the kitchen yet, but take a look at the beginnings of this livingroom!

And we have POWER! The circuit panel is all wired to the generator, inverter, batteries, and all over the bus.


Update, Sept 08:
We've been working on kitchen and bathroom lately:


Update, Oct 09:
Our project has really come together the last year.


Be sure to check the Ultra-Summary, which has more current pictures, inside and out
Too much reading? See the Ultra-Summary!
Look here
to see floorplan & design,Hope whatever you are doing, you are having at least half as much fun we are!
Cindy,
09/09/08
![]()